Welcome to Tuesday Tips with MODPractice!
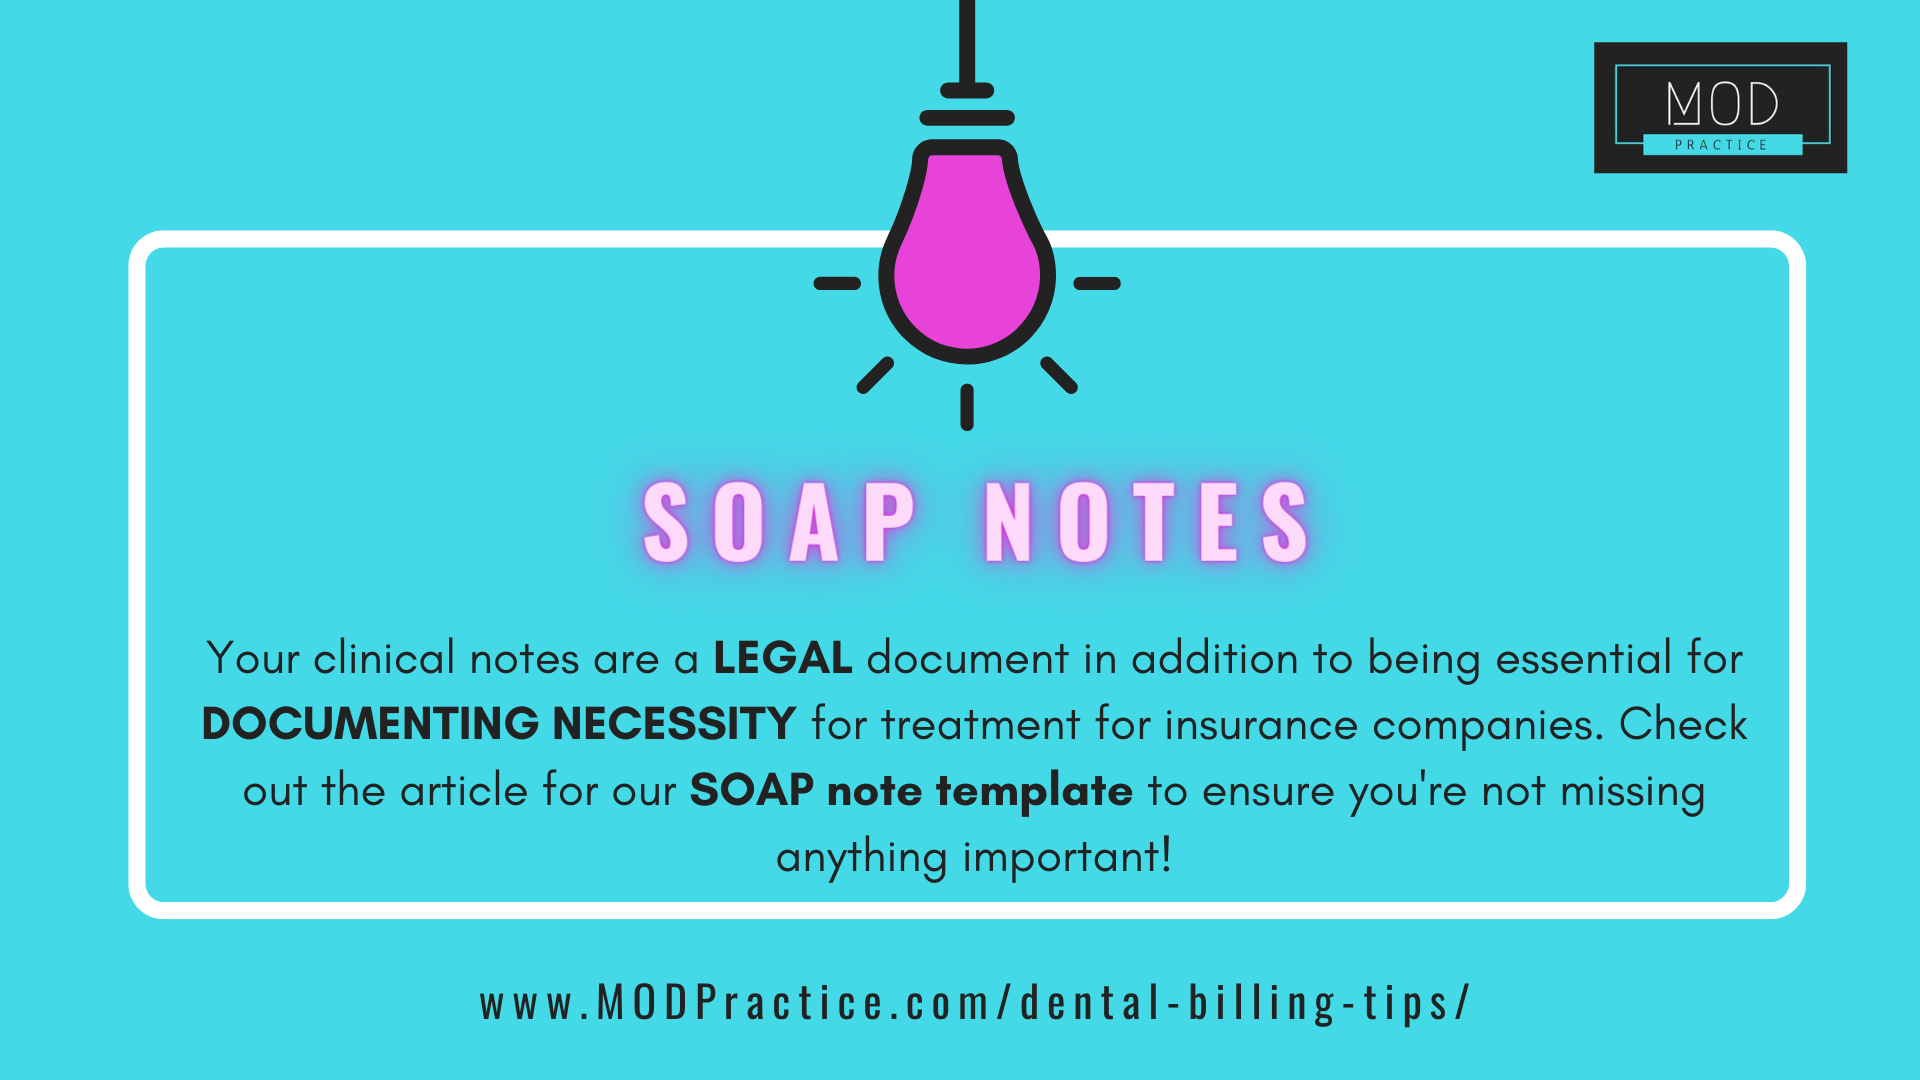
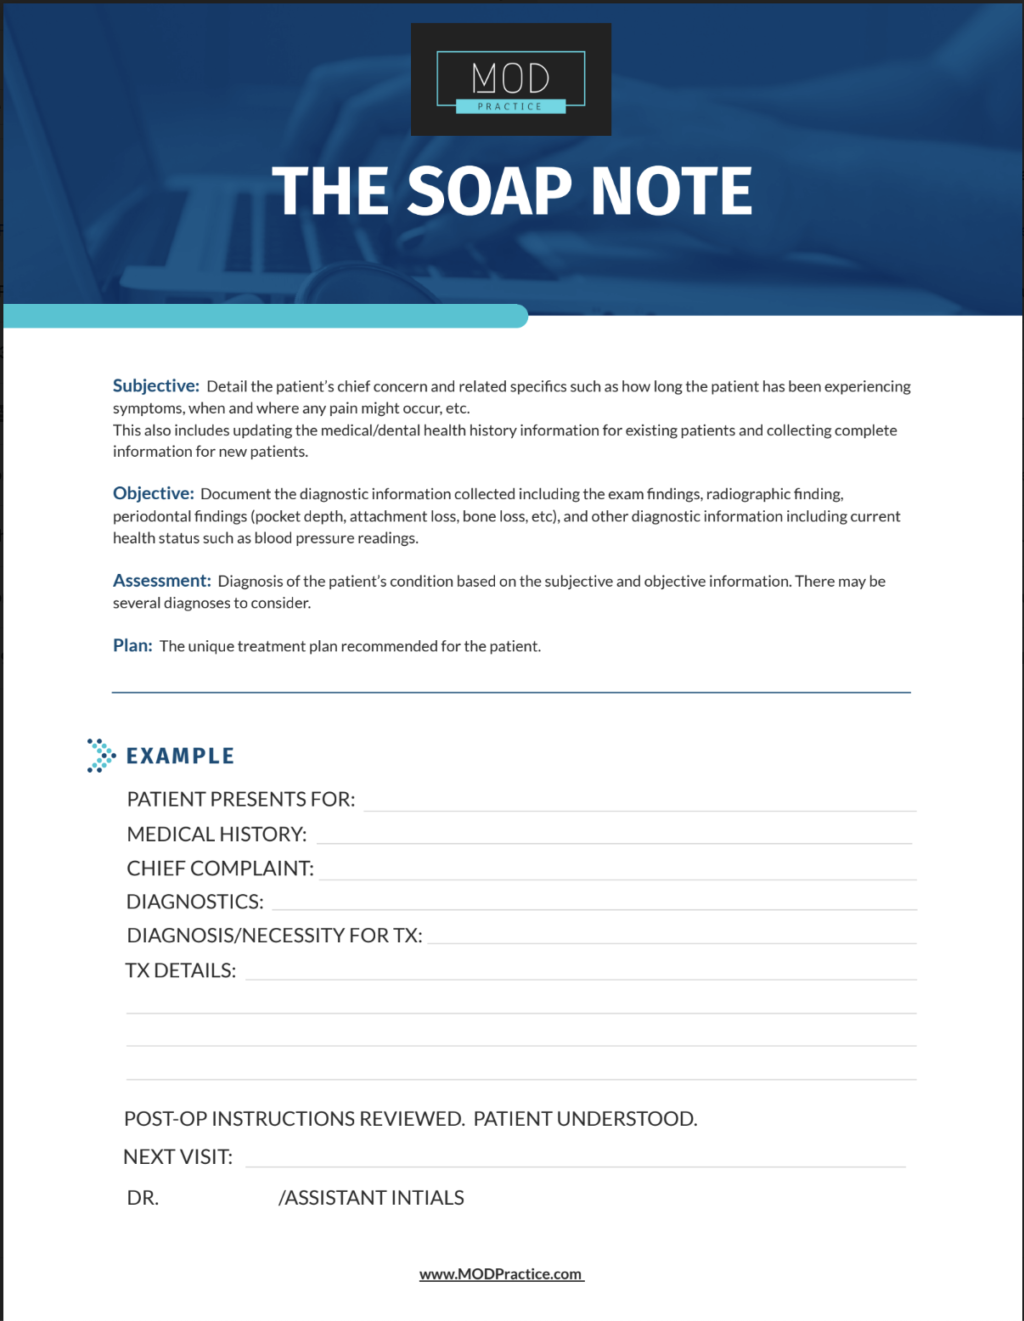
Utilizing the SOAP template minimizes the risk of failing to include important details in the patient’s record.
- Detailed notes are invaluable when it comes to receiving insurance payments for all major and most restorative procedures. They give your RCM team the information needed to communicate with the insurance company in an organized and understandable manner.
- Detailed notes are invaluable in terms of legalities. They are your first line of defense in any case of any legal need.
In either instance, people who weren’t sitting in your operatory need to know what you saw, your diagnosis, and why this treatment is necessary? When detailed enough, chart notes are always a better alternative than a narrative.
Think of it this way: What would your peers pay the claim if they read your clinical notes? Would they be able to get a clear picture of the problem, diagnosis, and treatment?” If the answer to either of these questions is no, or even “more information or a different type of xray is needed, chances are an insurance company would respond the same way.
Dentists are natural fact finders. A dentist typically wants to have all available information before they make a diagnosis and treatment recommendation. Insurance companies also wants to both have that information as well as understand it.
The good news? We’ve included a cheat sheet that will help you make sure you’ve included all the supporting documentation you need to both get paid faster AND cover you backside!
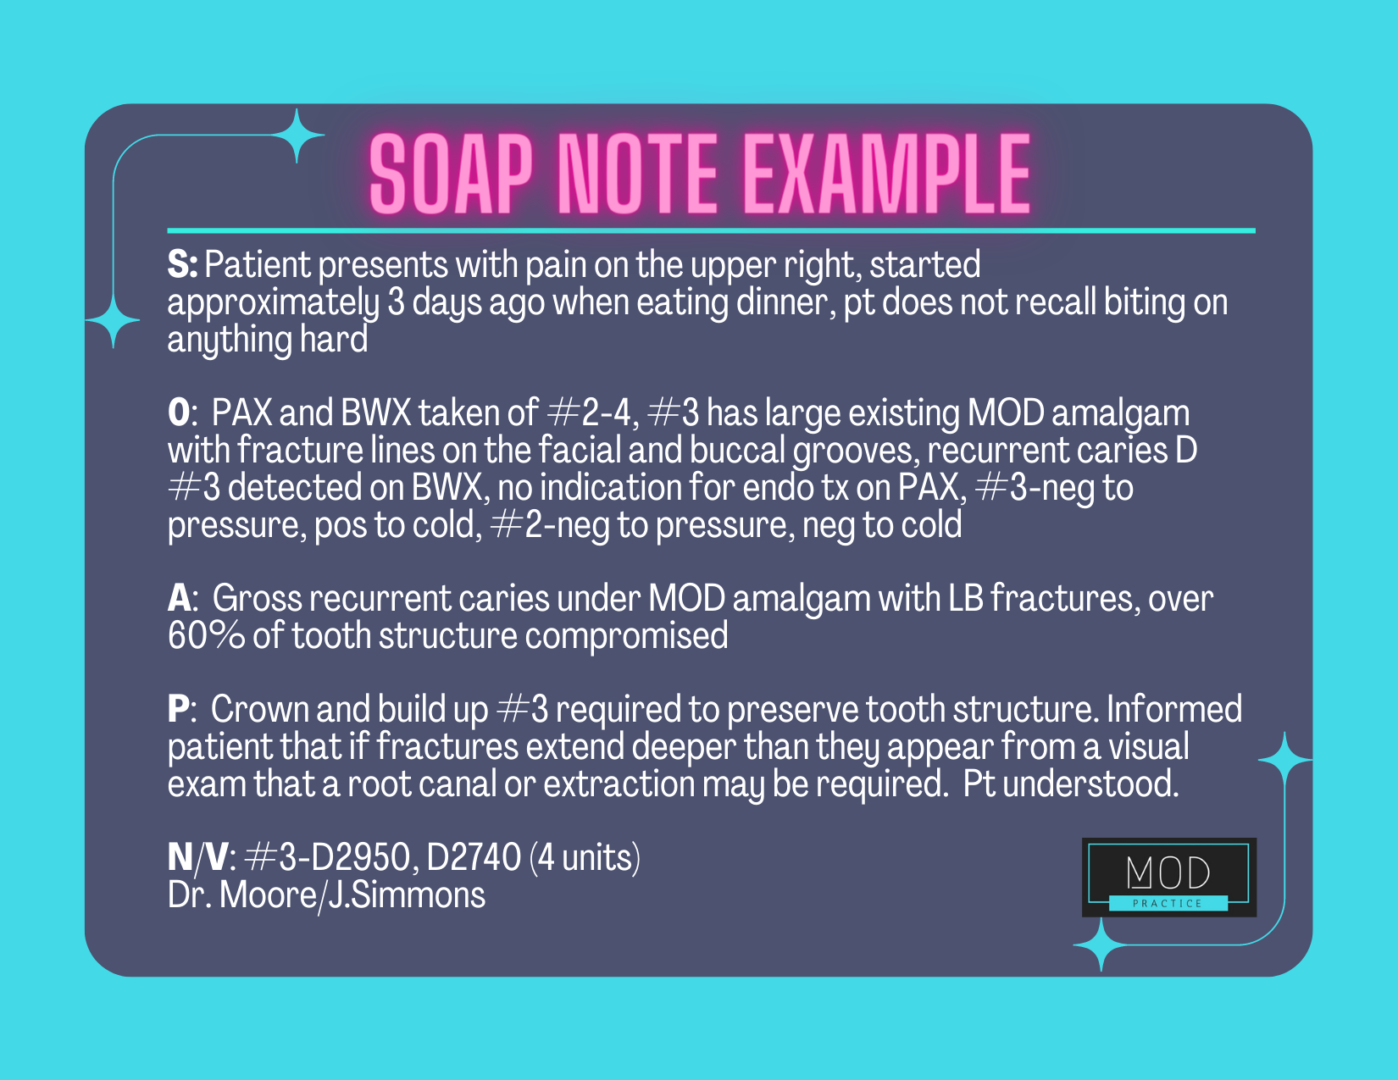
Here’s an example of a SOAP Note for a limited exam:
Last but not least, did you know you can create auto templates in most practice management systems?
To create a clinical note template in Dentrix:
- Specify the template name and category. In the Patient Chart, open the Clinical Notes tab and click the Template Setup button. Then click New Template. Select the category for this template (or create a new category as necessary), and then enter the template name.
- Enter template text and prompts. Type the text that you want to appear in the note. To add procedure-specific information like tooth number or surface, put your cursor at the place in the text where that info should appear and, under Clinical Note Prompts, click Select/Setup. Select the prompt you want to use and click Insert Prompt in Text.
- Create new prompts.If you want to add custom information to your note like a checklist of post-op instructions given to the patient, under Clinical Note Prompts, click Select/Setup. Click New and create your custom prompt. Then select that prompt and click Insert Prompt in Text.
- Save the template. Finish adding text and prompts to your note template and then click OK.
To create a clinical note template in Eaglesoft:
- Create a New Auto Note. From the Clinical or the Practice Management: Go to Lists | AutoNotes and click on New. Enter the note description and note text. You can also set a default text color for the new note. Click OK to save the note.
- Attach an Auto Note to a Service Code. Go to Lists | Services | Service Codes and edit the service code. Click on the PostProc button. Add the note to be used with this service code and click OK to save. When this service code is walked out for a patient, the note will automatically be placed in the patient’s Note History. Office staff can then verify the notes at a later time.
Interested in learning more about Revenue Cycle Management for your practice? Contact us today!